| August 2012
|
|
|
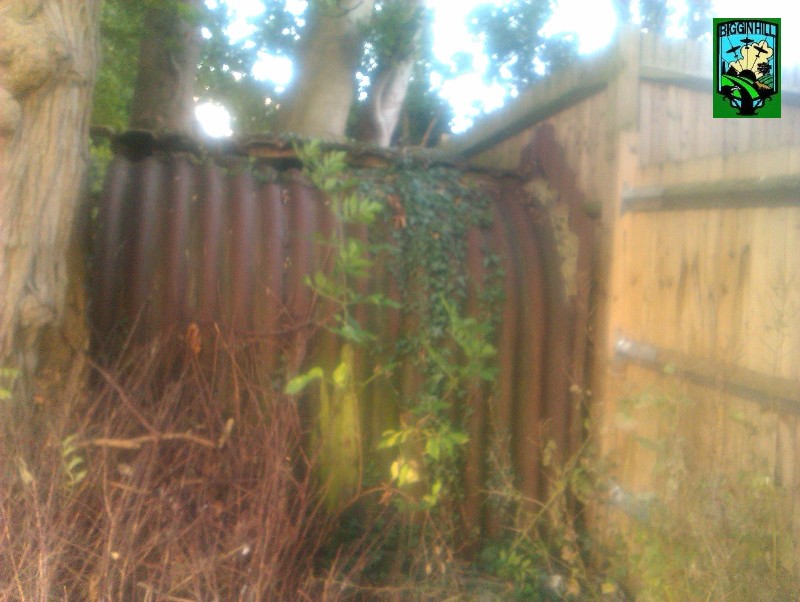
A friend of mine Dave who lives in the Bromley area
obtained the remains of an old shelter which was being scrapped, he
decided to renovate the shelter back to its former glory, and with the
help |
|
|
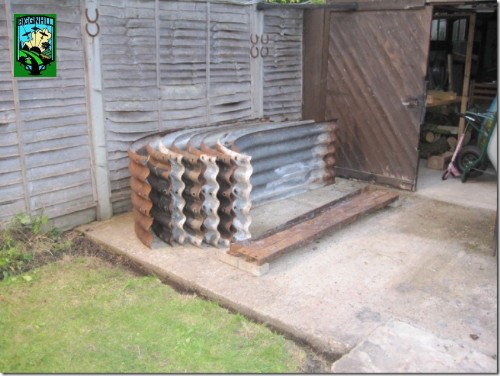
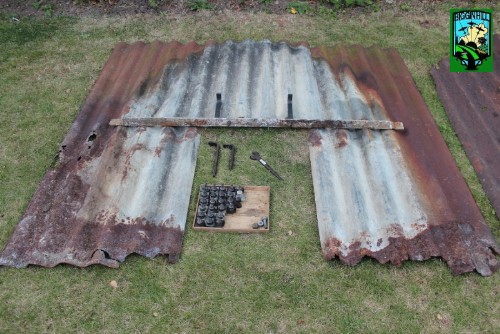
Here are all the components safety returned. The parts had to be inspected to see if they were useable and check that they were all there, using the instructions from me. |
 |
|
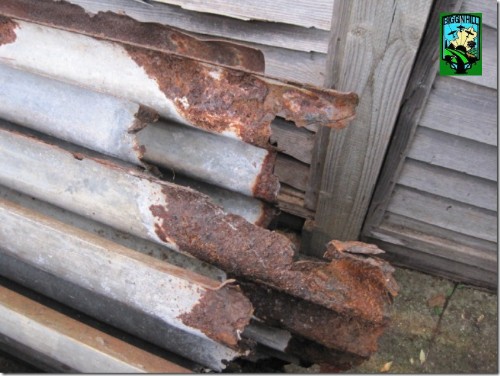
A few of the roof panels are in very bad condition after spending 70+ years in the ground so will need to be repaired or replaced. We contacted Colin Pascoe, a contributor to this website, had 4 panels that were in very good condition but they were being used. Dave went to see him and arranged a swap, four damaged ones for four good ones. He agreed. |
 |
|
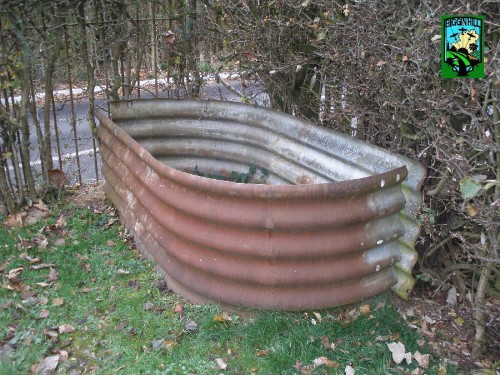
These are two of Colin's panels. Used for storing items, Colin was happy to take panels in a poor condition in exchange for these ones. Thanks you very much Colin. |
 |
|
So here we are. Colin's 4 side panels and 6 other panels with bad corrosion at the bottom.
Do YOU have any panels we could use? Call Tony on 0791-741-8997. |
 |
|
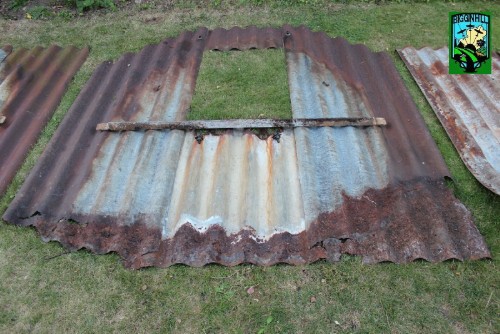
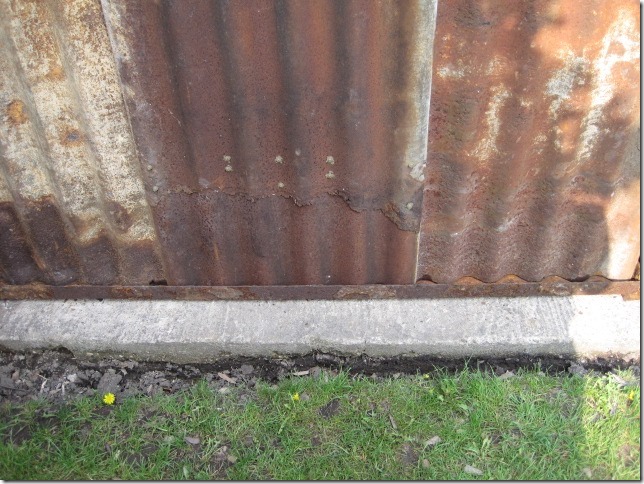
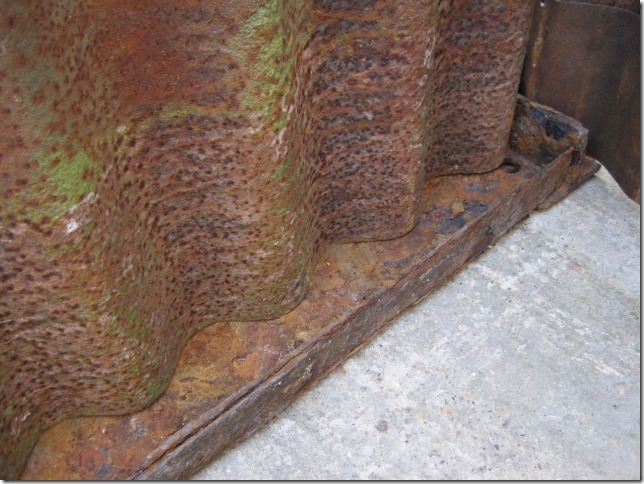
This is the front panel. In fact 4 panels, 2 at each side, 1 small at the top then one at the bottom. This leaves an opening to get in and out of the shelter. As you can see, where the shelter has been in the ground it has corroded very badly. Ideally we'd like to replace the back and front panels but they are hard to find - unless YOU know different? |
|
|
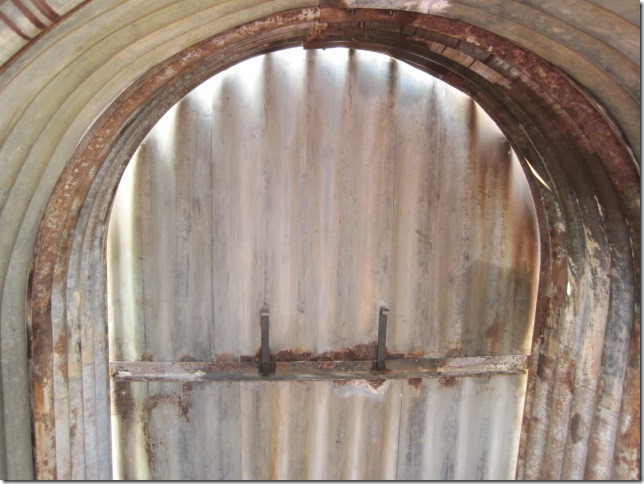
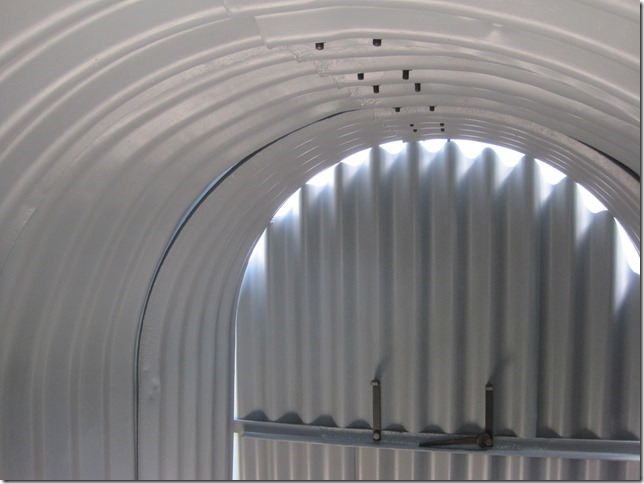
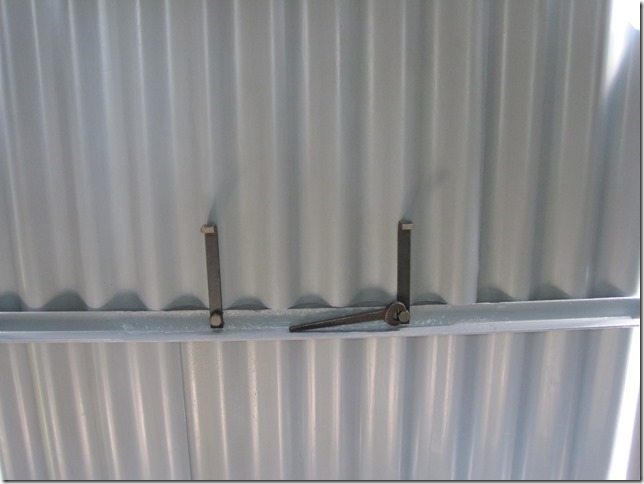
This is the rear panel. Once again in 4 parts. 2 side panels, a middle section at the top (which was the escape hatch - easily removed by lowering the two angle brackets) and a section at the bottom. This section is also missing.
Once again, do YOU have this panel we could use? Call Tony on 0791-741-8997.
|
 |
|
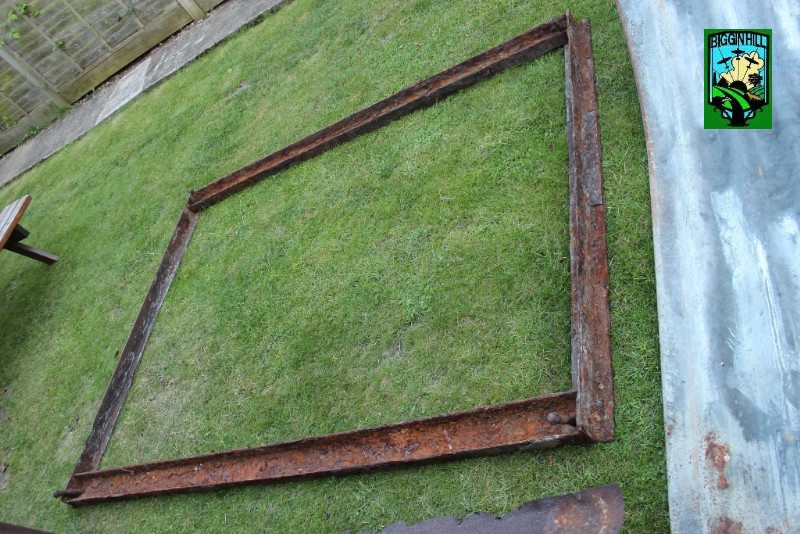
Luckily Dave had the presence of mind to dig out the base from the ground. This part is usually left in the ground but this is intact, including the 4 fixing rivets. |
 |
|
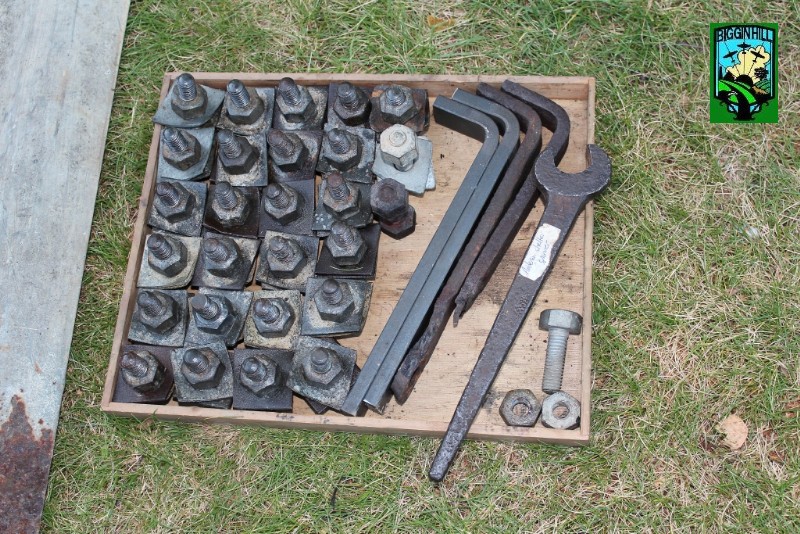
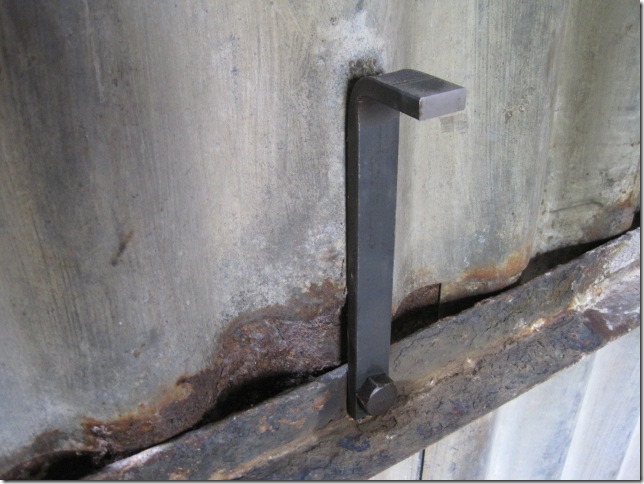
Nuts, bolts and washers. All original but we are missing one washer. I had 2 nuts, bolts and washers which i donated to the rebuild. The 2 angle brackets had been mostly eaten by rust so 2 new ones have been made. And, yes, that is an original spanner/tommy bar. |
 |
|
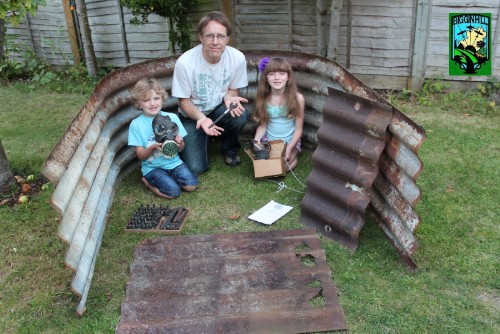
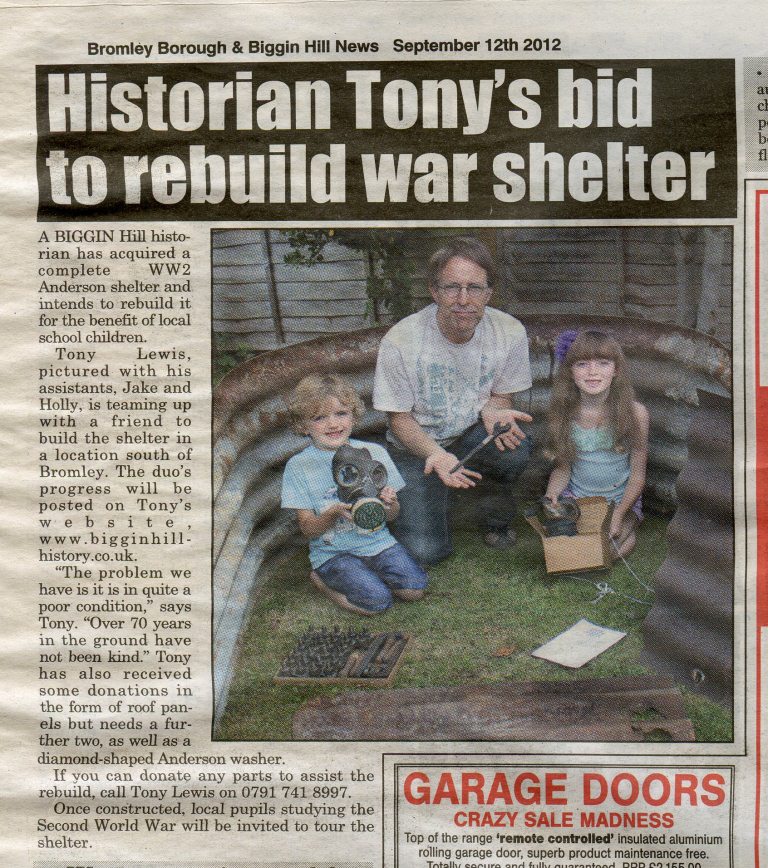
Me with Dave's children Jake 5 and Holly 7 both holding original WW2 gas masks. They will soon be studying the war at school and it's good to see they have an interest already. |
 |
|
12th Sept 2012. So we contacted some local papers and asked them if they could run an article about our project. Their response was very enthusiastic. This is how the Biggin Hill News reported it. Click on the picture for a full sized image. |
 |
|
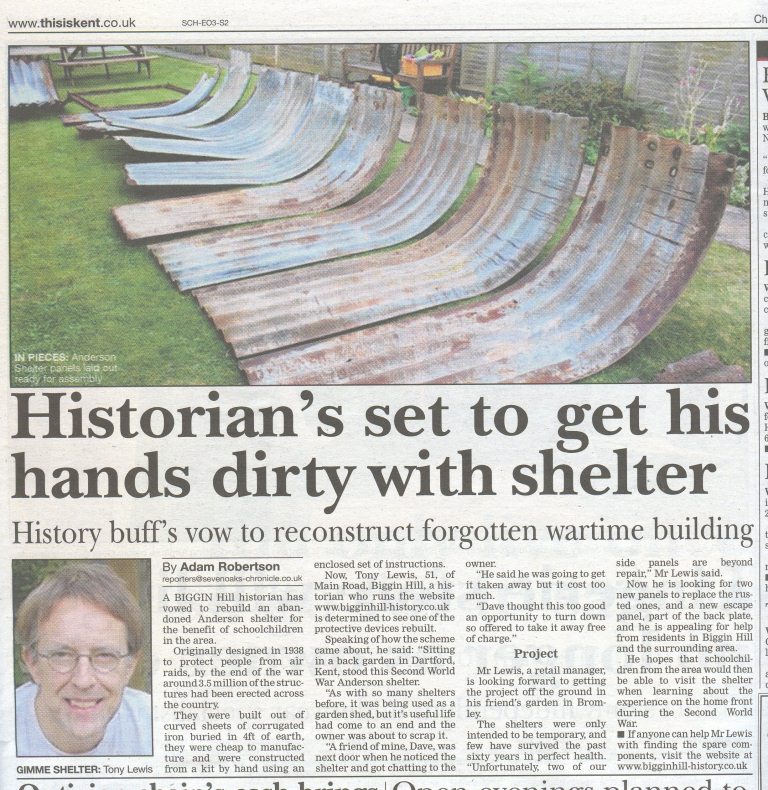
This is the article in the Westerham Chronicle. Once again, click on the picture for a larger image. |
 |
|
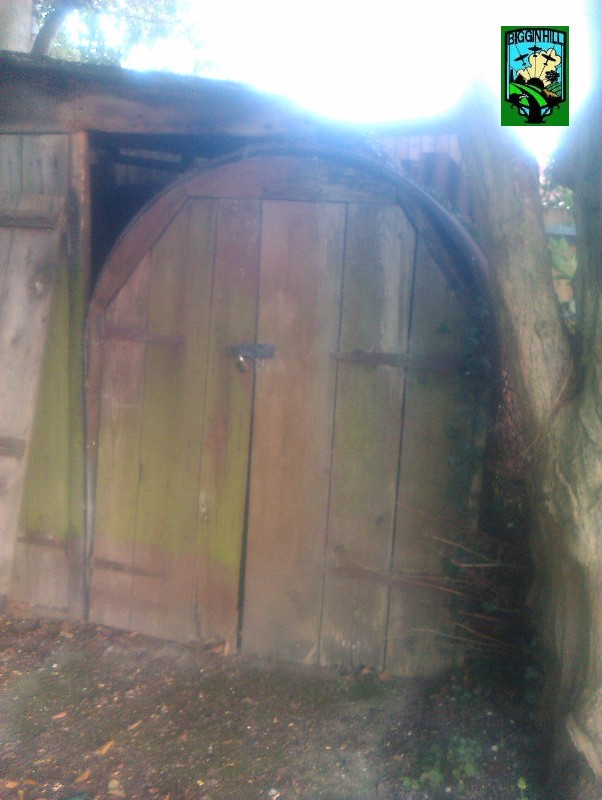
14th Sept 2012 The day after the Biggin Hill News was published I had a phone call from a resident in Orpington saying there was a shelter in their garden. I went to look it over. It was a 'shed conversion'. The front panel had been put at the back, minus the center sections, and wooden doors put in their place. It was sitting on concrete so i couldn't see the condition of the panels. |
 |
|
Side view. I only had my phone on me so the quality of picture is not very good but you can see the front panels at the back up against the fence.
|
|
|
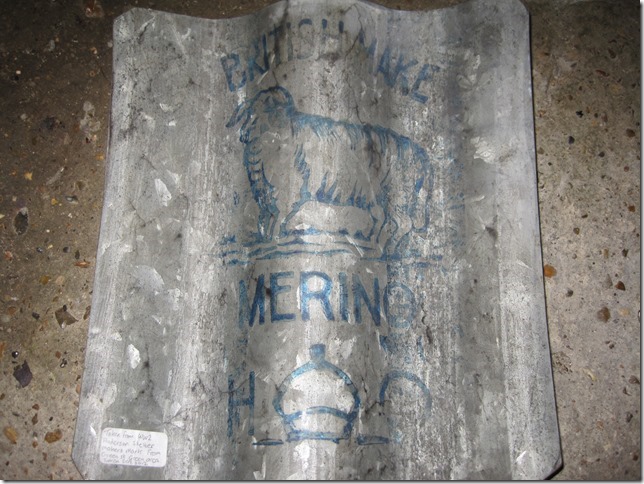
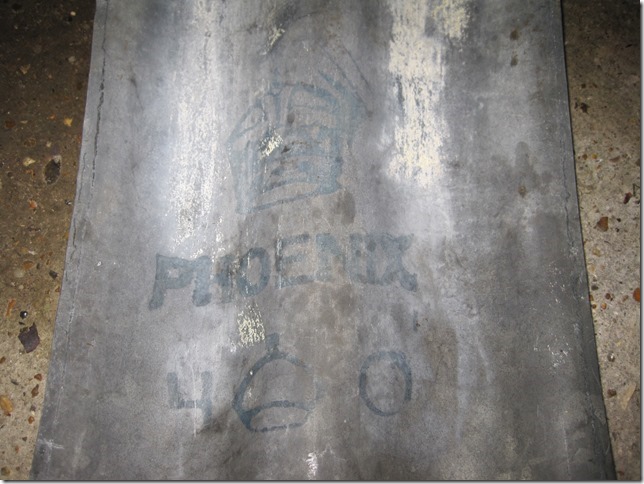
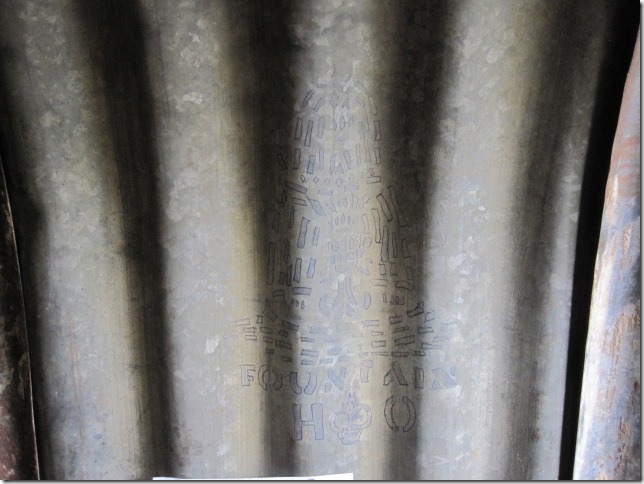
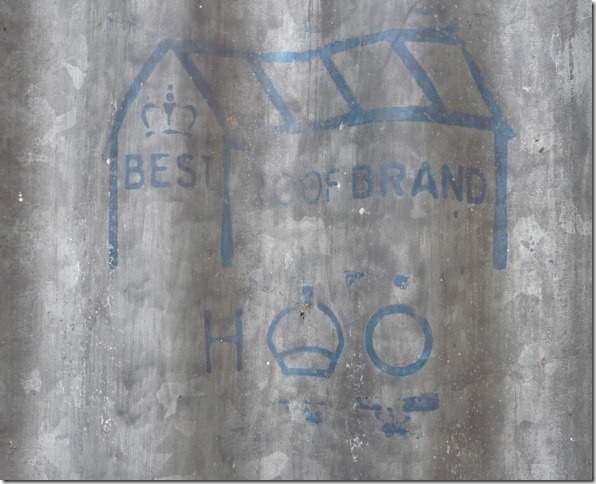
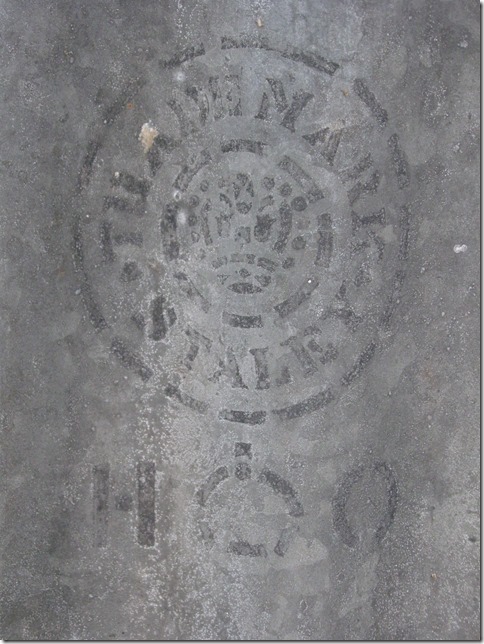
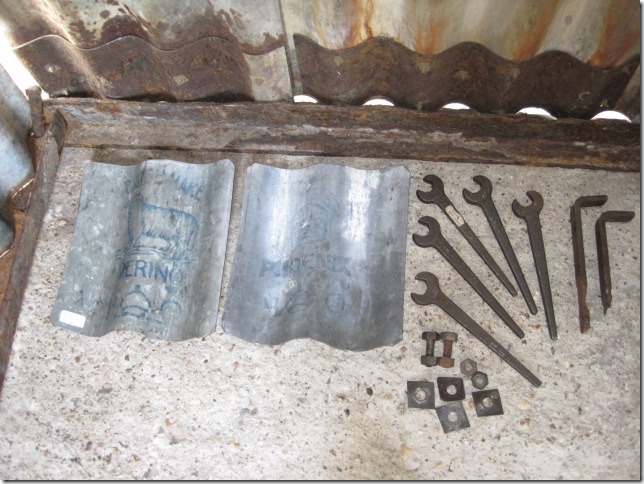
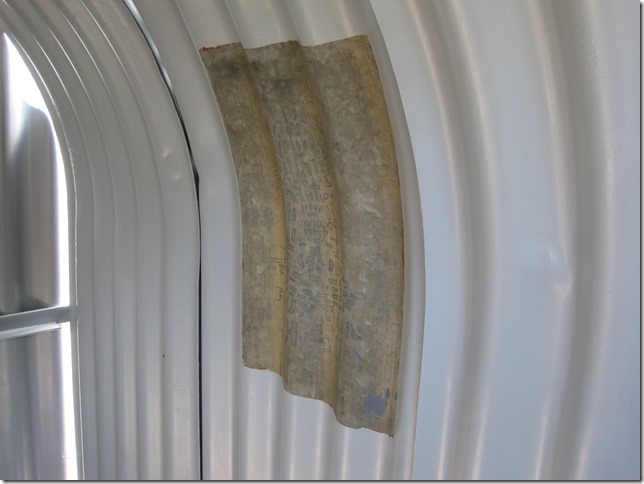
18th Sept 2012. David went to see the shelter and noticed the maker's mark inside. It is 'Merino'. This is the third maker mark we have now found. The others being 'Phoenix' and 'Fountain'. If you have a shelter, have a look inside and see if there is a maker's mark visible. If it is different to any of these please let me know. 21st August 2013 (update) More makers marks have come to light (with more on the way). They are 'Best Roof Brand' and 'Trade Mark Staley'. |
 |
 |
 |
 |
 |
|
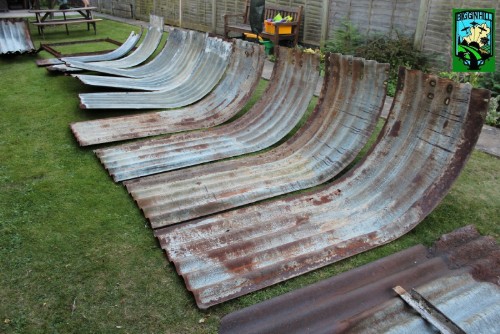
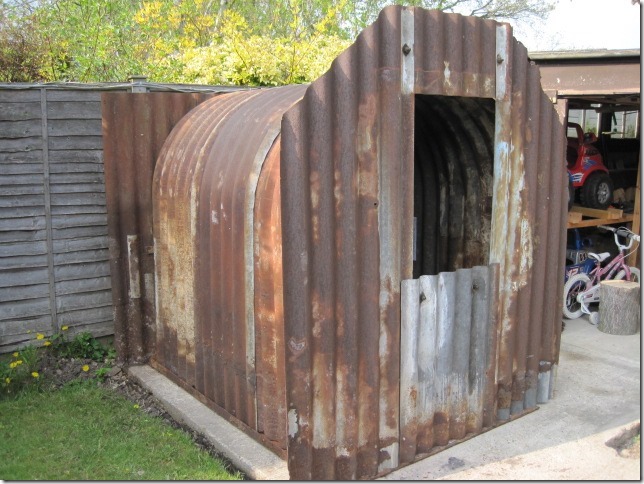
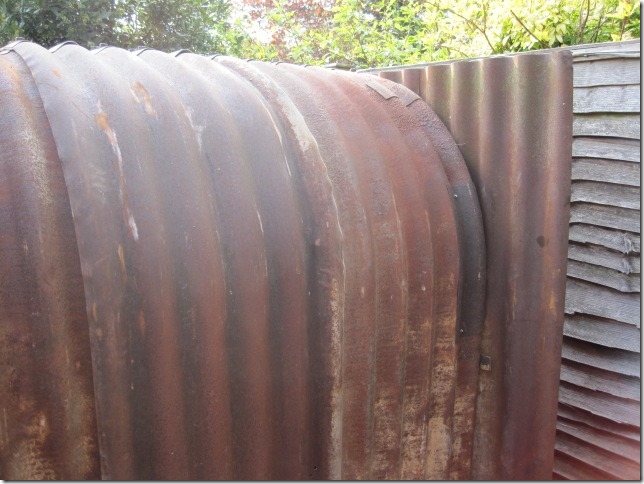
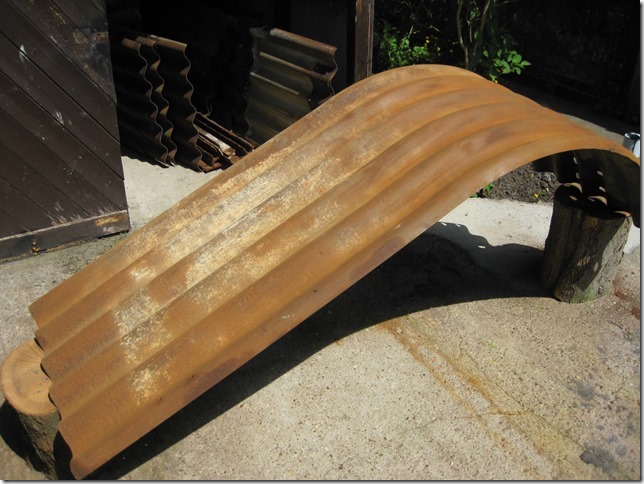
7th May 2013. Due to a very wet autumn and a very snowy new year, work didn't continue until May 2013. With all the panels repaired it was time to put it all together. Here the shelter is in its completed state. Some of the panels were so badly corroded that extra panels had to be sought and sections welded on to make complete sections. Some parts were so badly corroded that they couldn't be used and new, refabricated items were made, e.g. the escape hatch handles. The last picture in this section shows the spanners that Dave has acquired and the escape hatch handles he couldn't use. |
 |
 |
 |
 |
 |
 |
 |
 |
 |
|
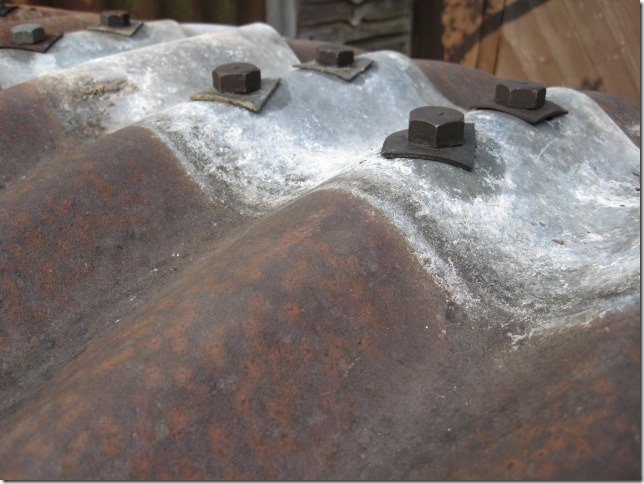
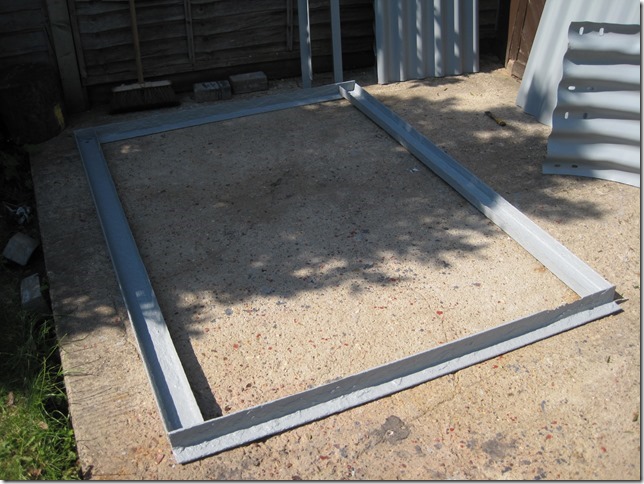
June 2013. With the fine weather arriving at last it was time to coat the panels to stop any further corrosion. Once the panels were rubbed down to get loose rust off an Alfa coat was painted on. This chemical prevents rust forming. Then a red oxide primer is painted on followed by 2 coats of battleship grey paint. With this level of protection, it's certain this particular shelter will last for many years.
|
 |
 |
 |
 |
 |
|
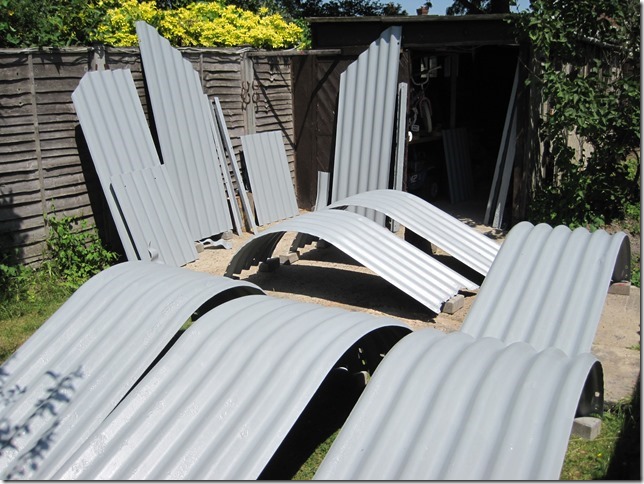
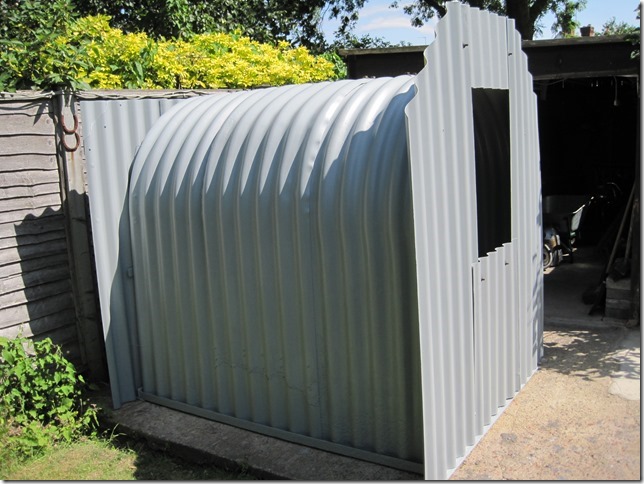
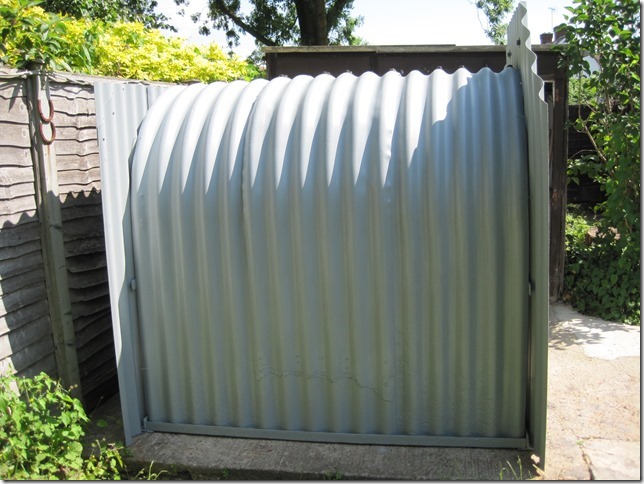
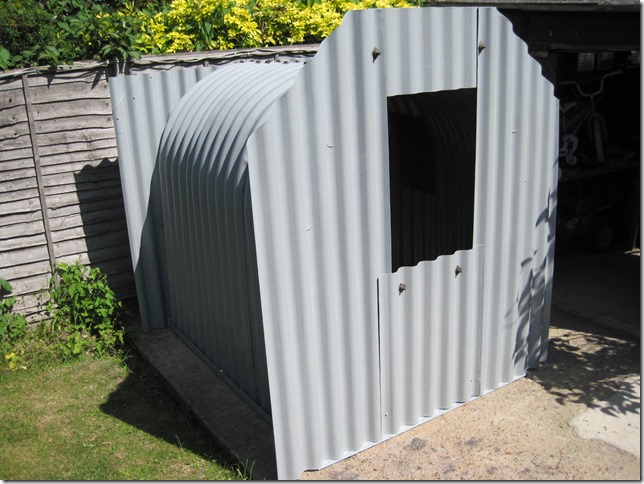
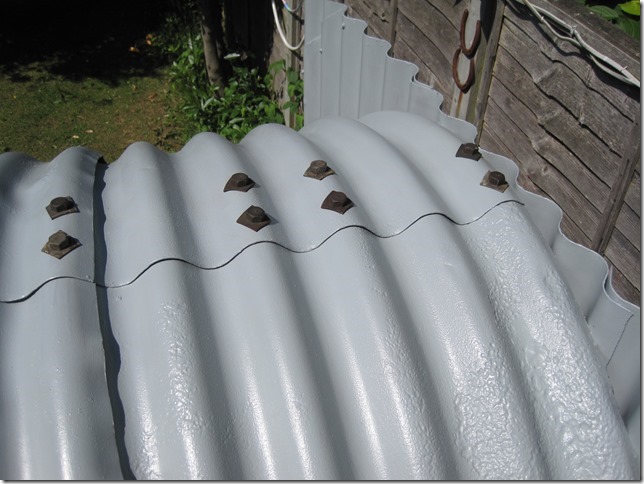
22nd August 2013. All the panels have now been treated and the shelter in assembled again. The joins can hardly be seen at the bottom of a number of side panels. The whole shelter looks as goods as, if not better than, new. The last picture shows the makers mark on this panel has been left un-painted for all to see. The next stage is to build the bunks that were an essential part of war time Anderson Shelters. |
 |
 |
 |
 |
 |
 |
 |
|
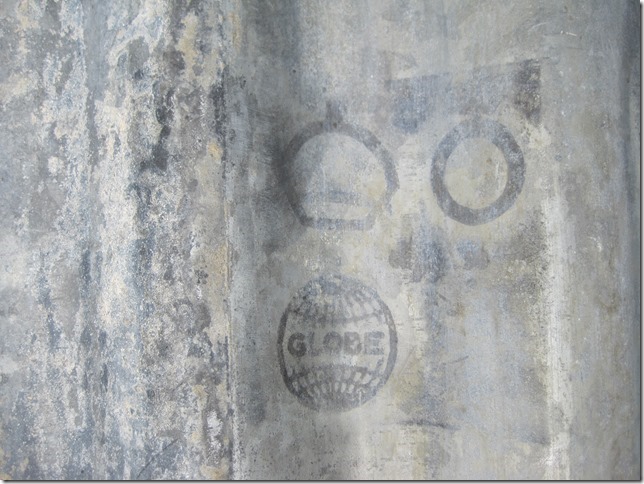
22nd Aug 2013. Dave has found another maker's mark. This time it's 'Globe'. Just how many different makers were there. |
 |
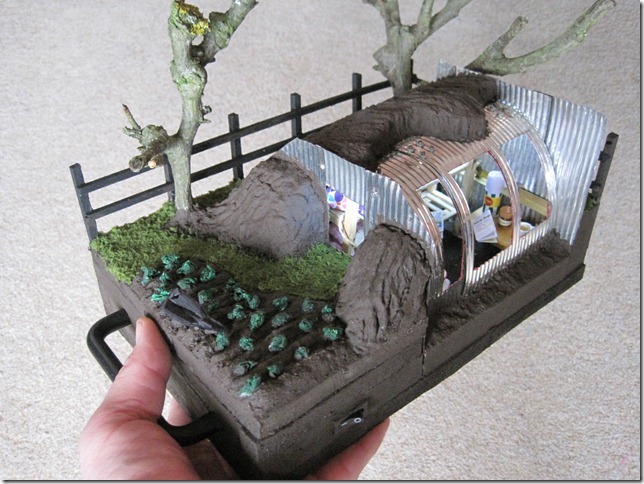
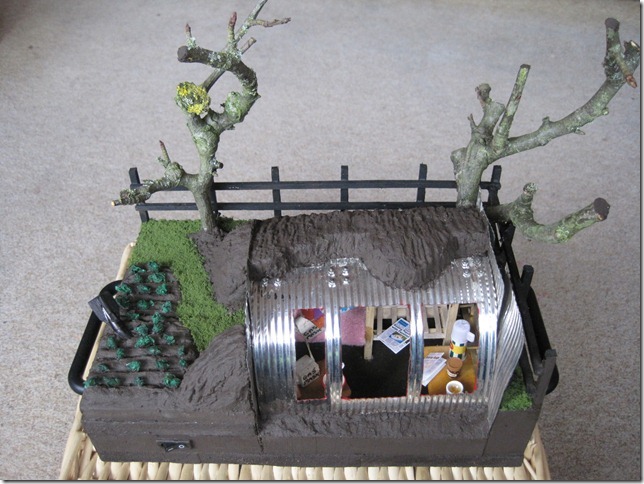
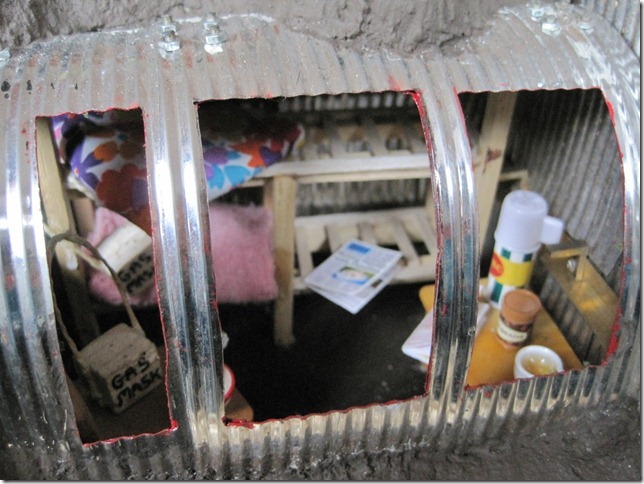
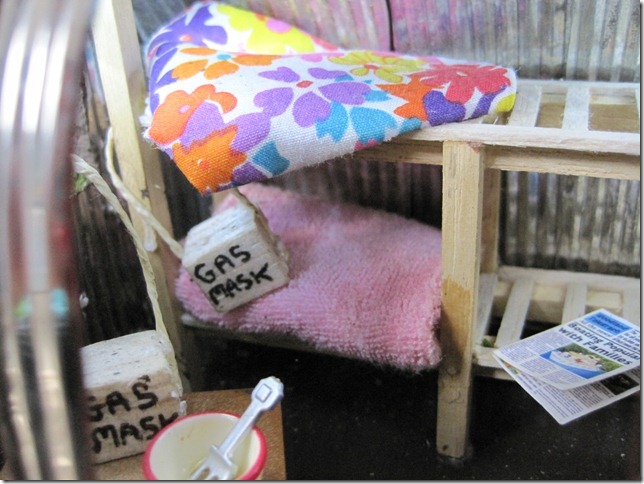
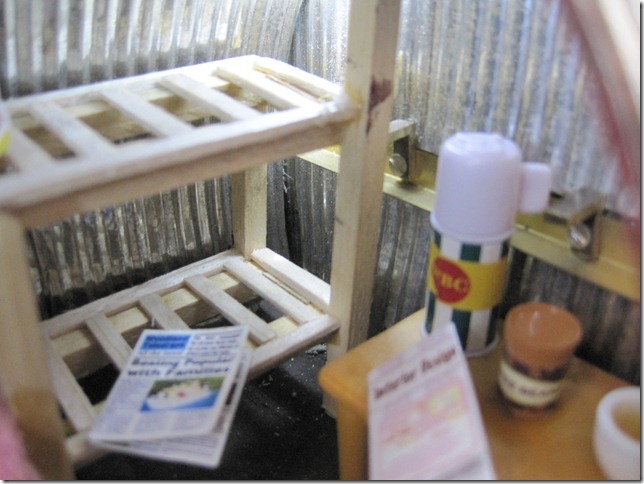
| At this point i want to add some pictures of a model that Dave has made of an Anderson Shelter in incredible detail. Fantastic work Dave. |
 |
 |
 |
 |
 |
Dave has put this short video on YouTube showing the model in detail.
|
21st Oct 2013. Dave has found yet another maker's mark. This time it's 'Emu'. There can't be many more, surely. |
|
|
|
|
|
|
|

+++++++++++++++++++++++++++++++++++++++++++++++++++++++++++++++++++++++++++++++++++++++++++++++
|
|
|
|
|
|
|
|
|